
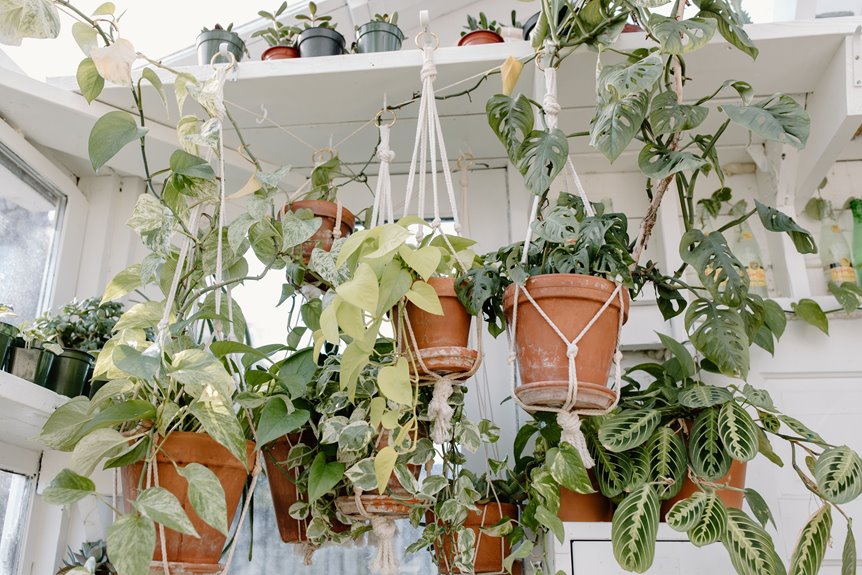
I’ve rounded up ten DIY hanging plant holders you can build today using simple materials you likely already have. You’ll start with basic rope hangers that need zero tools, then level up to macrame using just three essential knots. Foraged branches, repurposed beaded garlands, and spray-painted hoops add instant character. Glass propagation tubes, faux leather straps, and wicker basket conversions round out the collection with modern and bohemian options. Each project transforms everyday items into functional plant displays. You can work through every step to pick the perfect match for your space and skill level.
Simple Rope Hanger for Beginners (No Tools Needed)
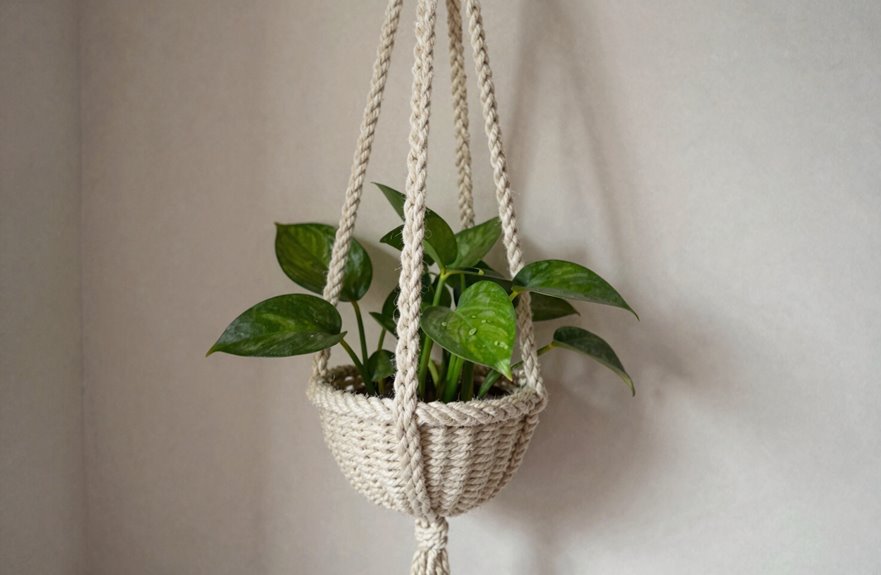
Why overcomplicate your first hanger? This rope hanger project is genuinely beginner-friendly and requires zero tools, just your hands and patience.
Start with eight rope strands, tying a knot at each end. Invert your pot and divide strands into four pairs, forming four knots just below the pot edge. After securing that first level, cross neighboring rope pairs around the pot, taping them temporarily to keep everything aligned. Space your knots to create three or four levels depending on pot size, checking that rope ends stay even before trimming. Finally, gather all ends at the top and tie one solid knot for hanging.
Customize fringe length, rope thickness, or strand count to match your preferences and decor style.
Branch and Rope Hanger From Foraged Materials
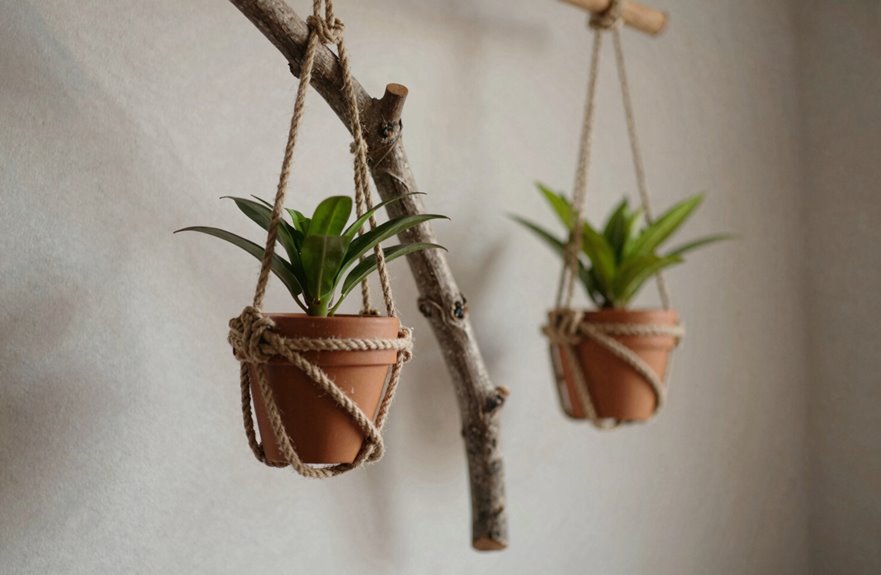
I start by scouting my neighborhood or a nearby park for a sturdy, well-dried branch with interesting character and enough girth to support my plant’s weight. Once I’ve gathered my materials, I secure the rope around the branch’s center point and install ceiling hooks that can handle the combined load. With everything anchored properly, I hang my potted plant from the branch, creating a raw, sculptural statement.
Material Sourcing
A sturdy branch and some rope are all needed to build a hanger that looks like it came from a boutique shop. For supplies sourcing, search outside first. Look for a straight, smooth limb about one to two inches thick, something that feels right in your palm. Once you’ve found your branch, gather eight strands of jute rope, each six to eight feet long, providing plenty to work with for knots and finishing. For hanging hardware, you’ll need a sturdy ceiling or wall hook anchored to a stud. Clean and dry your branch, then wrap the top few inches to create a neat tie-in point. A coat of outdoor-safe paint or stain matches your space while protecting the materials.
Assembly Steps
With materials prepped, here’s how to build this hanger step by step. First, secure your foraged branch to the ceiling with a sturdy hook, creating the anchor for your plant hanger. Then grab eight strands of rope and pair them into four groups. This ensures even weight distribution when your hanging pot fills with soil.
Start tying knots at measured intervals, spacing them to form tiered levels that cradle the pot. Feed your hanging pot between the rope groups, adjusting each knot’s height so the container rests securely above the final knot line. This prevents wobbling and keeps everything stable.
Finally, gather all strands at the top, tie a solid hanging knot around the branch, and trim the ends evenly. You can now hang plants from found materials.
Beaded Hanger Using Repurposed Holiday Garland
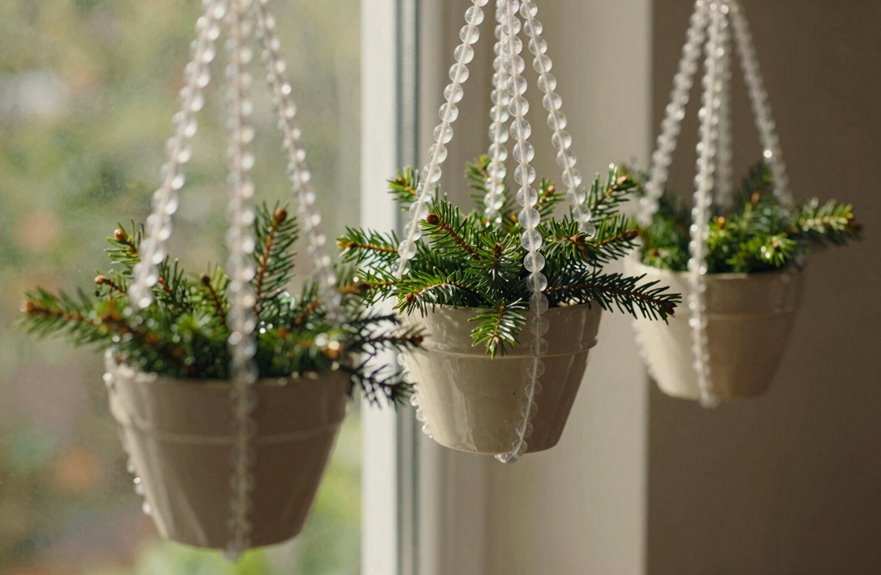
Since you’ve likely got a tangled strand of wooden beads hiding in a holiday storage bin somewhere, pull it out and give it new life as a boho plant hanger. This beaded hanger transforms forgotten holiday clutter into something you’ll actually display year-round.
You’ll need that repurposed garland, some embroidery hoops for structure, and minimal tools. Perfect if you’re just starting your DIY journey. Thread the beads in balanced sections, counting carefully so everything hangs evenly. No drill required; just knotting skills you’ve probably already got.
Slide your pot into this boho plant holder and your space instantly feels more collected and more personal. Guests will ask where you bought it, and you get to say, “I made it.”
Spray-Painted Hoop Planter in 30 Minutes
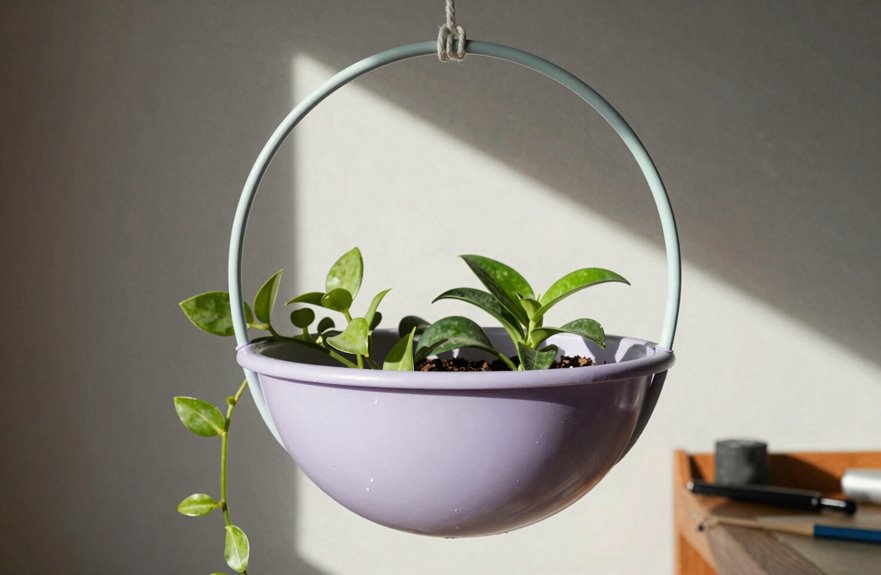
I’ll walk you through how to make this sleek hoop planter in half an hour. Gather a wooden or metal hoop, spray paint, a small pot, and some cord. Paint and assemble the pieces, then hang it up to display your favorite trailing plant.
Gather Your Supplies
A few basic supplies transform an ordinary wooden hoop into a sleek hanging planter in about half an hour. Here’s exactly what you’ll need.
First, grab a wooden embroidery hoop between 8 and 14 inches so it stays balanced once hung. You’ll also need spray paint in whatever color matches your preference, plus sturdy rope or cord for the rope knots that’ll hold everything secure. Don’t forget a small pot that fits inside your hoop, sandpaper for light prep, and primer if your hoop’s particularly porous.
Gather these items before starting. Hunting for supplies mid-project wastes time and breaks your workflow. Once you’ve got everything laid out, you’re ready to create something beautiful for your space.
Paint And Assemble
The wooden hoop takes on new life with a few quick coats of spray paint. I mask off sections I want untouched, then apply lightweight outdoor spray paint in thin, even layers. Within thirty minutes, including primer if needed, my hoop planter transforms completely.
| What I Feel | Why It Matters |
|---|---|
| Pride | I created something beautiful with my own hands |
| Anticipation | Watching colors shift from plain to purposeful |
| Connection | Joining a community of makers who value craft |
| Belonging | This piece carries my unique creative fingerprint |
I let the hoop dry vertically overnight to prevent smudges. For assembly, I thread rope through the painted hoop, attach a small pot, and secure everything with tight knots. The finished hoop planter reflects my participation in a community of makers who build beauty from simple materials.
Hang And Enjoy
Once the paint’s cured and the knots are tight, this piece is ready to work. This spray-paint transformation created a half-art, half-planter statement for anyone seeking minimalist decor with personality.
To make it effective in a space:
- Suspend it near a sunny window where the hoop catches morning light
- Pair it with trailing ivy or a compact succulent for visual balance
- Coordinate the spray-paint finish with existing hardware for cohesion
- Position it at eye level where clean lines draw attention upward
These hanging planters deliver modern simplicity without consuming square footage. In thirty minutes, you can join a community of makers who understand that restraint is intentional design.
Macrame Hanger: Three Knots to Master
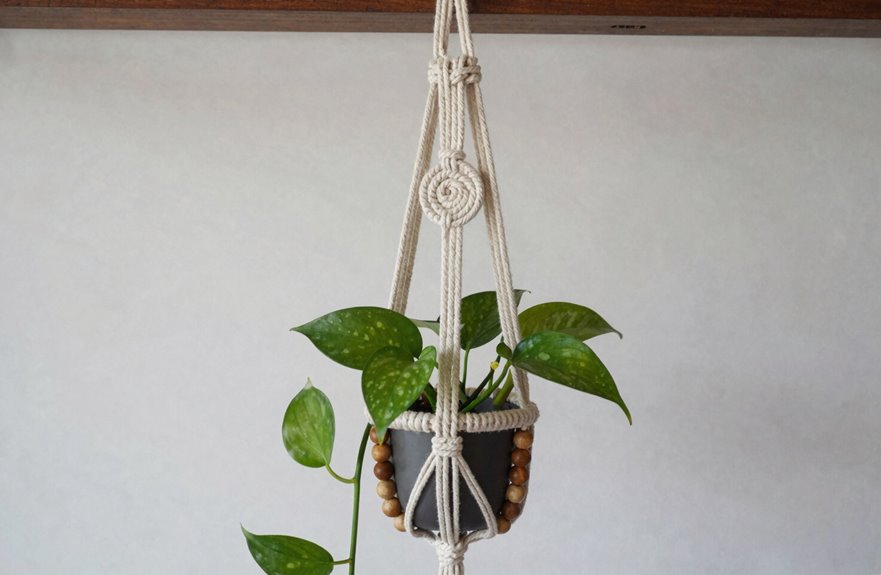
Although macrame looks intricate, mastering just three foundational knots opens up endless possibilities for creating sturdy, beautiful plant hangers. Countless crafters have discovered this satisfying art form.
Start your macrame journey with the lark’s head knot. Fold eight rope strands in half, loop them over your holding cord, and pull the ends through to create a secure foundation attached to the pot. Next, pair strands and tie square knots just below the rim, forming that distinctive cross pattern. These knots create tension and structure while spacing perfectly for support.
For the third knot, gather all strands and wrap them tightly near the top, finishing with a loop for mounting. Even tension is critical. Pull each knot with consistent pressure so your hanger hangs straight and true.
Wood Plant Stand With Built-In Hanging Hook
Why settle for separate furniture and hooks when you can build a plant stand that does both. I’m crafting a wooden hanging plant stand that merges style with function.
Why settle for separate furniture and hooks when you can build a plant stand that does both?
- Cut a 21-inch 2×4 and two 34-inch 2×4s for the U-frame, plus a 26-inch 2×8 base
- Drill pilot holes and screw the frame together, keeping the nicest side facing down
- Attach a 26-inch 2×4 top with an eye hook centered 13 inches from one end, 2.25 inches from the front
- Paint or stain all six pieces, waiting six hours between stain and polyurethane coats
Mount this hanging plant stand to a ceiling hook, and your trailing pothos will have adequate support. This design combines two functions into one finished piece.
Trellis Shelf for Vertical Wall Gardens
Blank walls are wasted real estate in my book, hence I’m building a trellis shelf that turns vertical space into a living garden. I’m mounting cut boards to my wall with sturdy leather straps, creating a vertical garden that welcomes everyone who enters my home.
My trellis shelf combines horizontal surfaces with vertical support, letting me layer multiple plant holders at staggered heights. I’m using a simple base frame with slatted sections that cradle inexpensive plastic planters perfectly. The structure invites trailing vines to climb and cascade, building that lush, connected atmosphere we crave.
I’m painting mine to match my decor and sealing it against humidity damage. This DIY project transforms empty walls into thriving, shared green space where my plant community and I can grow together.
Glass Propagation Tubes for Wall Display
I want to show you how glass propagation tubes can transform your wall into a living gallery of rooting cuttings. You’ll learn to choose the right tube shape and size for your space, discover effective mounting techniques that won’t damage your walls, and master the simple care routine that keeps your cuttings thriving while their roots develop on full display.
Tube Selection Tips
The right glass tube transforms a simple cutting into a living display piece. Choosing glass tubes requires attention to both aesthetics and function to create a thriving rooting environment.
Consider these factors:
- Diameter matters – wider tubes accommodate thicker stems and more rooting media
- Length creates drama – taller tubes showcase extensive root development vertically
- Wall thickness ensures durability – thicker glass withstands daily handling and refilling
- End cap quality prevents disasters – proper sealing maintains humidity and protects your walls
Match your mounting options to tube weight and wall material, ensuring your propagation display stays secure. Transparent glass tubes reveal every stage of root development, allowing you to document and track progress throughout the rooting process.
Mounting Methods
Where should your propagation tubes live? Wall mounting these glass vessels creates an instant display that other plant enthusiasts will recognize and appreciate.
I secure my propagation tubes with sturdy anchors rated for water weight to prevent accidents. I arrange them in staggered formations or tight geometric clusters, mixing heights to create visual interest. These vessels serve as conversation starters that draw visitors in.
I choose clear glass to display those delicate root systems. The vertical arrangement maximizes small spaces while creating a striking focal point. When friends visit, they linger by the wall-mounted tubes and point out new roots, examining the growth progress.
Plant Care Basics
My propagation tubes demand attention beyond their mounting. Successful propagation in glass tubes requires consistent plant care to keep the green community thriving.
My routine includes:
- I wipe condensation gently to maintain crystal-clear visibility of root progress
- I rotate tubes weekly so every cutting receives balanced natural light penetration
- I trim emerging roots before they tangle, promoting healthy development
- I refresh water-based solutions regularly, ensuring cuttings stay hydrated without soil complications
These glass tubes transform my wall into a living laboratory where I witness growth daily. By monitoring moisture levels and root formation through transparent walls, I catch issues early and prevent root rot, algae growth, and bacterial contamination. The transparent walls allow me to track development without disturbing the cuttings, which reduces stress on new growth.
Faux Leather Strap Hanger for Modern Spaces
Why settle for ordinary macramé when you want something sharper. This faux leather plant hanger delivers clean lines and contemporary edge. Vegan leather straps replace knotted cords, giving your space that polished, architectural feel.
Strap lengths and attachment points adjust to cradle anything from tiny succulents to hefty ferns. No rigid sizing limits constrain your options. Strong metal anchors and reinforced ends keep everything secure, preventing crashes.
This plant hanger integrates seamlessly into modern decor schemes. Its knot-free silhouette complements minimalist furniture without competing for attention. Wipe straps with a damp cloth when dusty, and keep it away from harsh sun to prevent fading. The result is a space that feels intentionally designed.
Rattan-Style Hanger From Wicker Baskets
I transform forgotten wicker baskets into rattan-style hangers that bring warmth to any corner. This hanging planter project lets you craft something beautiful while embracing sustainable style.
How to elevate your space:
- Select wicker baskets with tight weaves and natural wood tones
- Wrap four rope segments around the rim, securing with decorative knots
- Attach ceiling hooks and adjust fringe length for personalized height
- Apply clear sealant to protect grain texture and enhance durability
This rattan-style piece accommodates trailing succulents or compact greenery in your home. The woven texture complements minimalist walls or coastal-inspired corners. You’re creating functional spaces with visual interest through sustainable design.