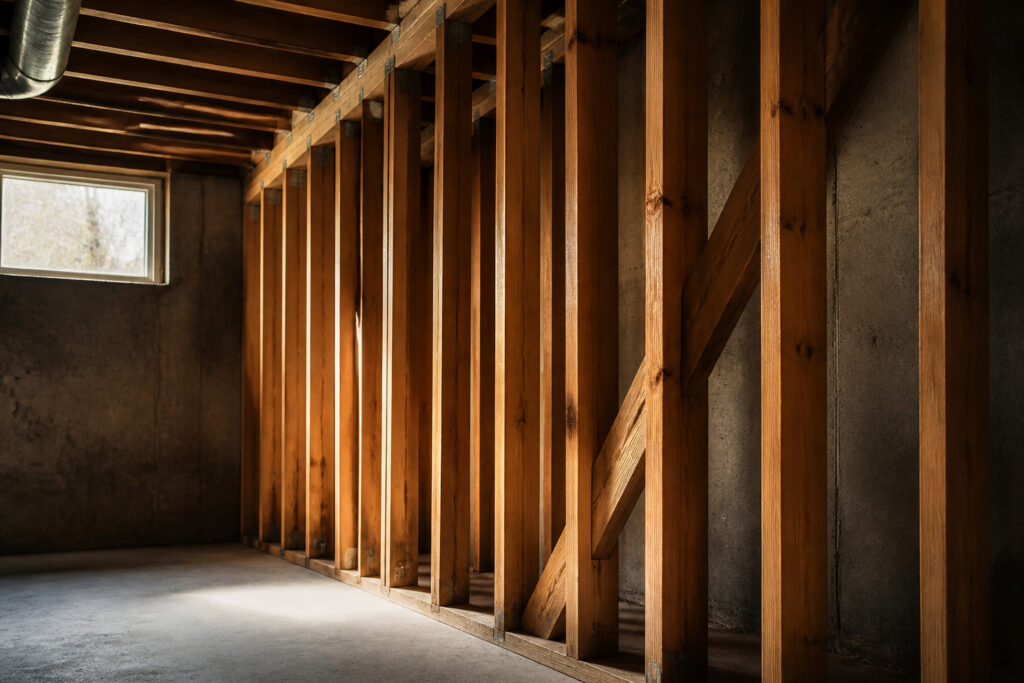
A wood framing wall is the structural skeleton that carries the weight of a house from roof to floor, built from vertical studs, horizontal plates, and headers over every opening.
The lumber you choose and the height you build to decide whether the frame stays straight or warps into a problem you fight through every later stage.
Standard 2x4s work for interior partitions up to 8 feet, but push past that or step outside and the same studs may rack, bow, or need splices that act like hinges in the wall.
[link-whisper-related-posts]Lumber Size and Type
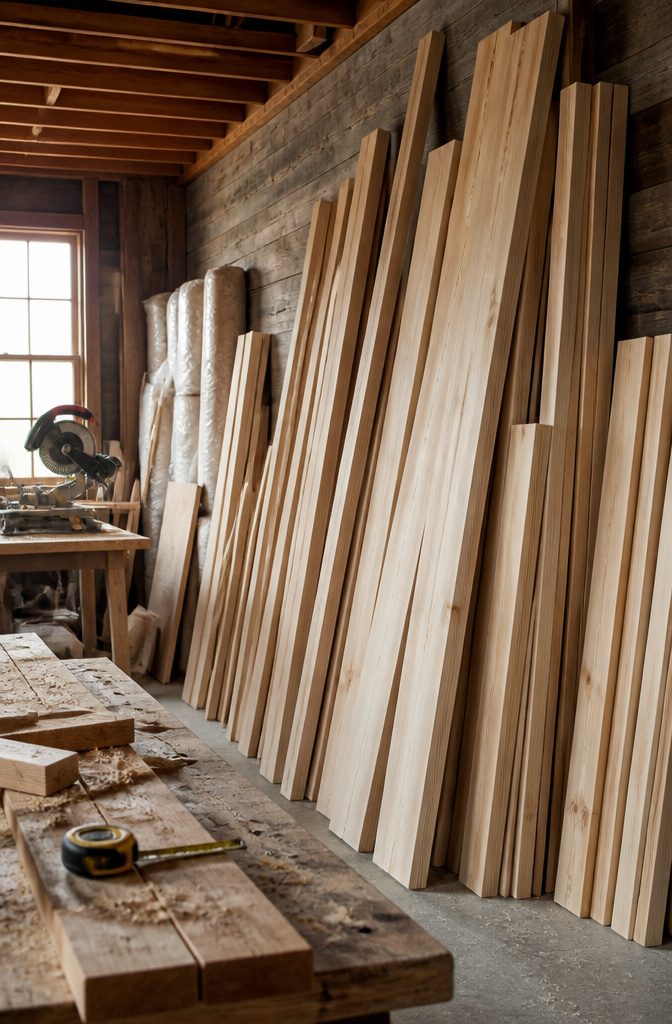
Standard dimensional lumber runs to 20 feet in length, which covers most interior partition walls and shorter exterior runs without issue.
For a wood framing wall, 2x4s remain the common choice inside the house, while 2x6s make more sense on exterior walls where insulation fills the deeper cavity.
Owners on Reddit note that finding straight material gets harder as the stick gets longer, and some contractors switch to engineered lumber like LSL simply to avoid wrestling with a warped board.
Taller walls change the math. Once you push past what full-height studs can reasonably span, the fixes get messy: double studs lapped and fully fastened, steel straps on each face, or sistering full-height members alongside a splice.
None of these are what you want to plan for.
If the wall is tall enough to need a hinge mid-height, that is usually a signal to step up to 2×6 or 2×8 joist material, or to move entirely to engineered lumber rather than forcing dimensional stock to do work it was not meant to handle.

16-INCH ON-CENTER SPACING: Stud tool precisely marks standard 16-inch on-center stud layout for professional framing work, ensuring accurate wall construction every time. (NOTE: Fits actual 1.5" wide wood)

Efficient Framing Tool: this 16 inch framing tool is capable of accelerating your framing speed by up to 50%; It is a necessity for carpenters and homeowners engaging in home renovation projects; Say goodbye to complicated measurements and welcome speedy, accurate framing
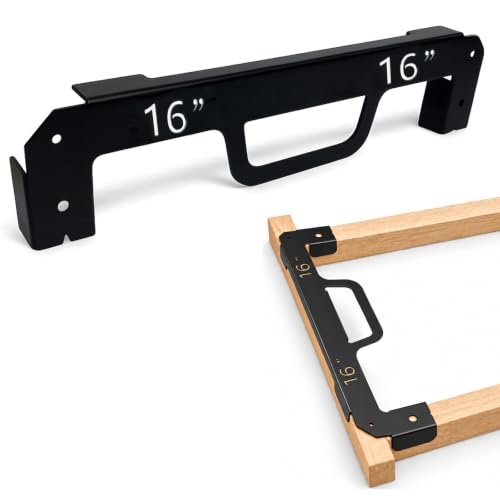
16-Inch Stud Layout Accuracy: Designed for standard 16-inch on-center spacing, this stud spacer framing tool helps create precise wall stud layouts with consistent measurements and reduced errors.
Cutting Studs, Plates, and Headers
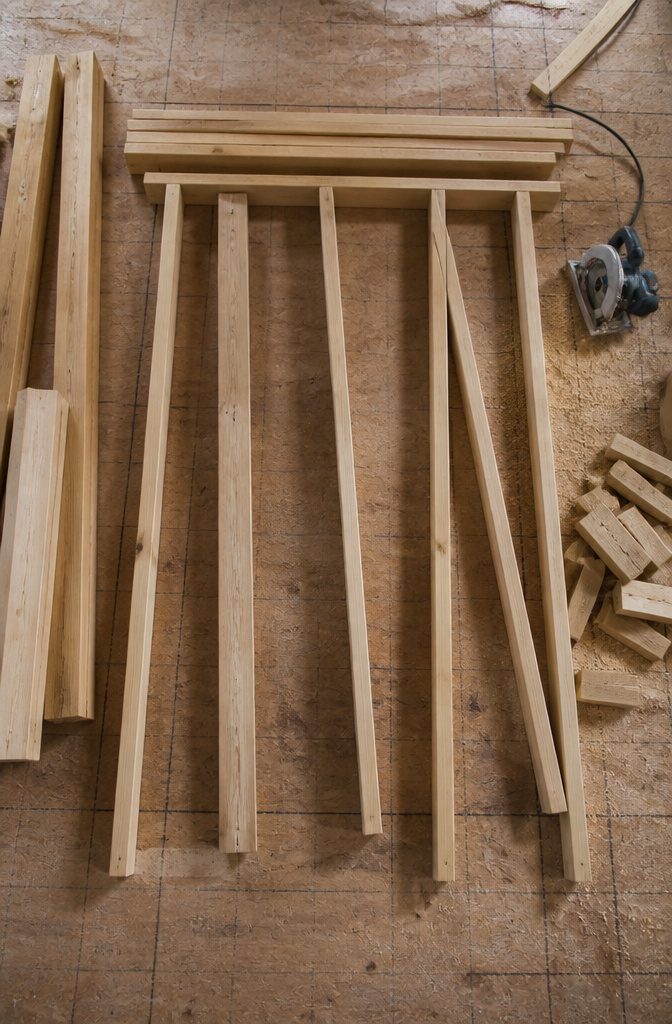
The three parts that make up a wood framing wall each get cut to a different job.
Studs run vertical, carrying the load from roof to floor, and they sit 16 inches on center as the standard spacing you’ll see in nearly every residential build.
Plates lay horizontal, one at the bottom to anchor the wall and a double top plate above to tie everything together and overlap joints at corners.
Headers bridge the gaps above doors and windows, taking the weight that would have pressed down on the missing stud and spreading it to the trimmer studs at each side.
Owners on Reddit mention that finding straight dimensional lumber past 16 feet gets harder, and some contractors switch to engineered lumber like LSL just to get material that doesn’t fight back during layout.
For a weekend wall under nine feet, standard studs cut clean enough; for anything taller, the same users note that #2 or Select Structural joist material runs up to 20 feet before you need to look at engineered options or start splicing, which introduces a hinge point most builders try to avoid.
Cut plates to the full wall length plus overlap, headers to the rough opening width plus the bearing on each trimmer, and mark every stud position before you lift a single piece off the pile.

Sturdy Joist Hangers: The concealed joist bracket is made of Q235B steel,no deformation.Black powder coated,No easy rust,sturdy and durable.

【Joist hangers with Screws】Each rafter brackets package includes 25 pcs face mount wood bracket, 100pcs 1.57inch long screws, 30pcs 2.17inch long screws and a pair of glove, specifically combination for 2x6 nominal lumber (actual size 1-1/2″ x 5-1/2″) installation, providing ample support for your construction needs. With this set, No need to worry about mismatched screws. Cut costs, save time, and avoid headaches

PRECISE SIZE FOR DRYWALL PROJECTS: #6 x 2 in fine thread drywall screws in a 100 piece pack; engineered for secure and accurate gypsum board installation
Assembling the Frame
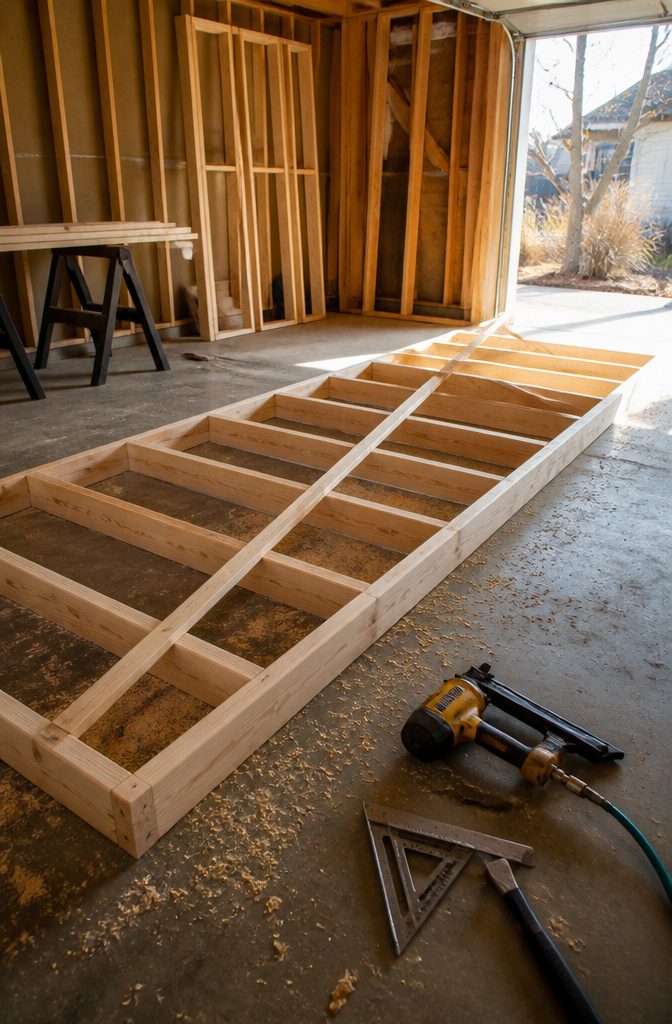
The wall frame goes together flat on the deck or garage floor, not upright. Bottom plate first, studs on layout, top plate last.
16d nails or 3-inch screws are the standard; nails are faster with a gun, screws let you back out a mistake without splitting the plate. Either way, two at each end of every stud is the minimum.
Square matters more at this stage than it will later. A frame that racks even an inch out of square will fight you through sheathing, drywall, and every door opening.
I check diagonals with a tape and tap corners with a sledge until the measurements match. A pinch of extra time here saves an afternoon of shimming later.
Temp braces or a scrap block nailed across studs will hold the frame square until you stand it. Without them, the rectangle drifts while you work headers or second top plates.

Diploma Size & College Major Logo Info - Complimentary Motivational Quotes Gold Keychain Gift exclusively by AllGiftFrames Framing Achievement Inc.
Diploma Size & College Major Logo Info - let us know your "diploma size," choice of two "insignia logos" and "gold or silver engraving" with "Personalization info." Make sure you let us know the correct diploma size. Complimentary Motivational Quotes Gold Keychain Gift exclusively by AllGiftFrames? Framing Achievement Inc.

Gold Engraving Plate Personalization College Gift Diploma Frame with Tassel Box and Two Double Gold Seal Insignia Glossy Walnut with Gold Accents Top mat Black Inner matted Gold
Headers and Openings
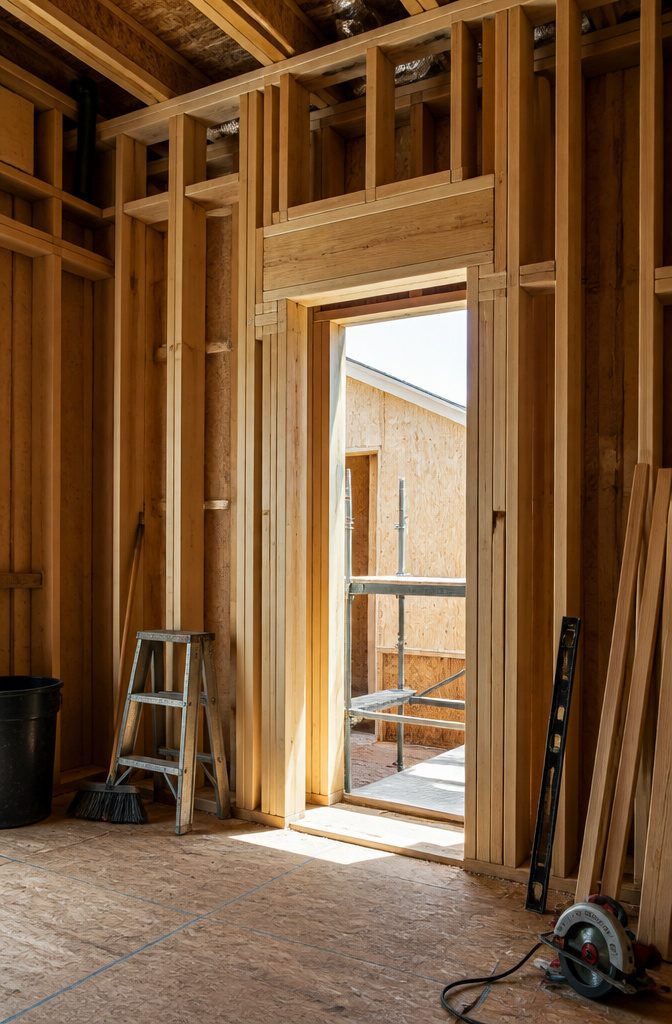
Every door and window in a wood framing wall interrupts the studs that carry the load downward, so the opening needs its own structural answer.
A header spans the gap, a beam of doubled or tripled lumber that picks up the weight from the shortened studs above and spreads it to the sides.
Without one, the ceiling or roof above settles and cracks in a season or two.
The studs that hold the header up are not all the same. Jack studs sit directly beneath the header ends, cut to the exact height of the rough opening, carrying the load straight to the sole plate.
King studs run full height beside them, from top plate to bottom, keeping the whole assembly from bowing outward under pressure.
On a standard 32-inch back door, you will use two jack studs inside the opening and one king stud outside each end.
Wider openings need more: a patio slider might call for two jack studs doubled up under each end of a heavier header.
The header itself is often built from the same dimensional lumber as the wall, just layered.
For a six-foot opening in a load-bearing exterior wall, two 2x10s with a strip of half-inch plywood sandwiched between them to match the 3½-inch stud thickness is common practice.
Interior non-load-bearing walls can get away with a single 2×6 or even a flat 2×4 on edge if the span is narrow enough, though I tend to overbuild rather than guess what the second floor might hold later.

The Builders Edge 43 5/8" x 6" Flat Panel Window Header Adds Decorative Architectural Detail To Your Windows

8" X 6" Flat Panel Window Header adds decorative architectural detail to your windows

8" X 9" Flat Panel Window Header adds decorative architectural detail to your windows
Raising the Wall
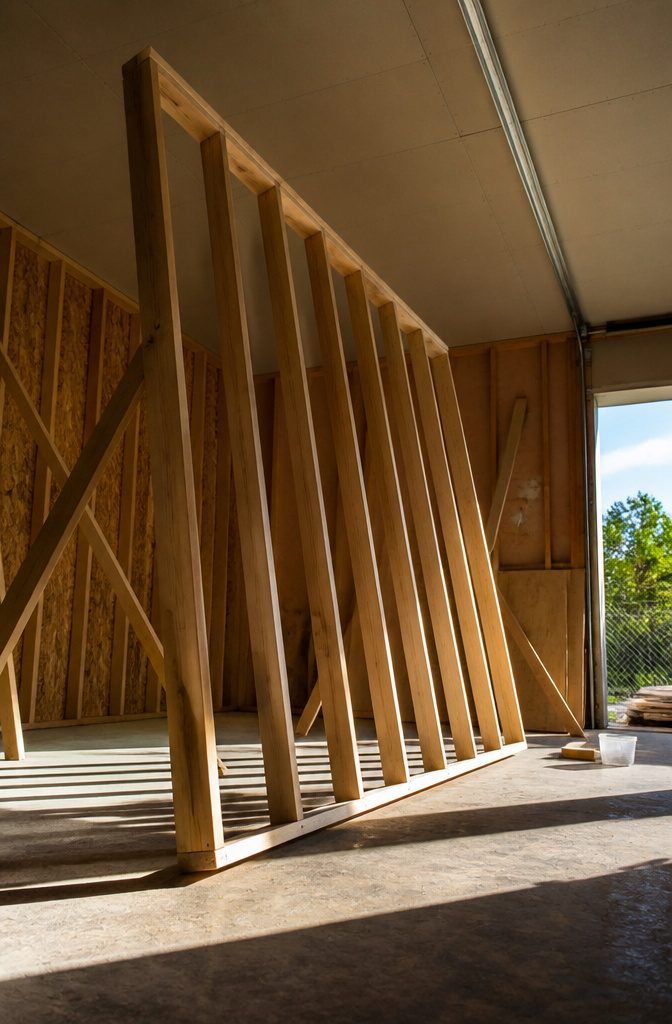
A framed wall on the garage floor looks manageable until you try to stand it up alone.
The plywood sheathing catches wind like a sail, and a sixteen-foot span of 2x4s has enough flex to make the whole thing feel alive.
This is a two-person job minimum, and a third person spotting the top plate saves a lot of cursing.
The bottom plate gets anchored first. I set the wall on layout marks, plumb the corners with a level, and drive nails or structural screws through the sole plate into the floor joist or rim joist below.
If you are working over a slab, wedge anchors through pre-drilled holes do the same work.
The code-fastener spacing is typically every sixteen inches, though I have seen inspectors accept a tighter cluster at the ends and one mid-span on short walls.
Adjacent walls tie together at the corners. The end studs overlap so both walls have solid nailing for drywall later, and I face-nail through the intersecting studs before the sheathing goes on.
Once the wall is plumb in both directions, temporary braces kick back to the floor at a forty-five degree angle and hold it until the roof or ceiling framing locks it in place.

Many Uses - This product is suitable for new home construction, renovation projects, and more and has been tested for many different jobs.

👍【Save Time】This 16 stud framing tool reduces errors and cuts building time down. Eliminated the measuring and marking the post. Properly aligning the studs perfectly and holding the stud in place for nailing. Our premium wall stud framing tool makes framing a breeze.

16‑INCH ON‑CENTER STANDARD ELIMINATES MEASUREMENT‑ERRORS - Strictly built following North‑American building‑standards for 16‑inch‑on‑center spacing. This precision‑measurement‑jig helps you mark stud‑positions quickly without repeated tape‑measure checks, perfect for dry‑wall‑framing and window‑header installation.
Sheathing
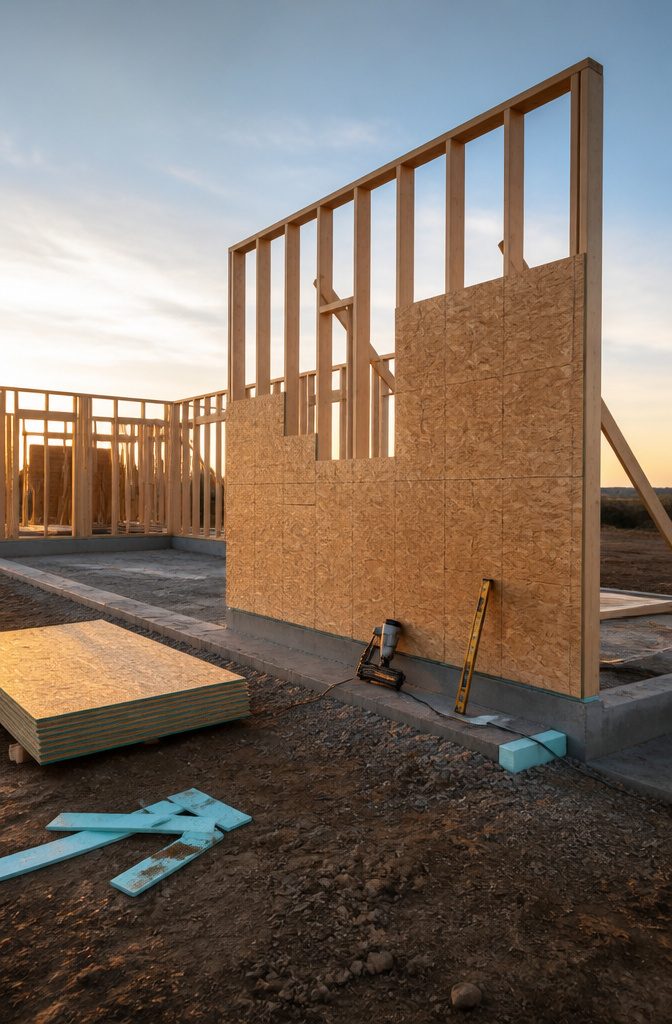
Sheathing turns the skeleton of a wood framing wall into something you can actually push against without racking.
Sheathing is what turns a frame from a wobbly stack of sticks into something you can actually work on without the whole wall swaying.
Plywood and OSB are the two materials you’ll see on every lumberyard shelf, and the choice between them is less dramatic than forums make it sound.
Plywood costs more and weighs more, but it handles moisture better during those weekends when rain shows up uninvited.
OSB is cheaper and the edges seal reasonably well with the right tape, though they swell if they sit wet for too long.
For a first wall, either one works if you keep the sheets dry until the exterior finish goes on.
OSB costs less than plywood, and the savings can cover housewrap to keep moisture out, which is the trade I made on my first shed.
Install panels with the long edge running horizontal across the studs, staggering seams so no line of weakness travels straight up the wall.
Glue isn’t necessary for most residential work, but ring-shank nails or screws at the specified spacing keep the connection solid when the wind hits.
The sheathing layer is also your last easy chance to correct a wall that’s slightly out of square before the exterior finish locks everything in place.

Used To Fasten Drywall To Studs

GLASS & FINISH: Features a Brushed Nickel finish and Rain tempered glass
Insulation and Vapor Barrier
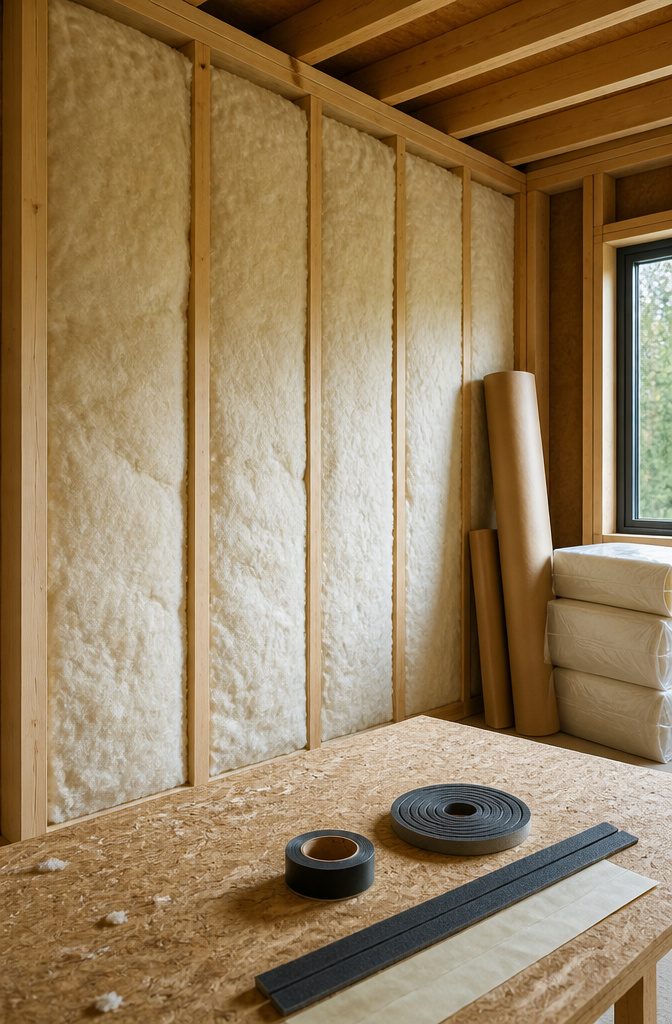
The insulation goes in after the frame is plumb and the electrician is done. I use fiberglass batts in most of my walls, cutting them to fit between studs with a serrated knife and a straightedge.
A vapor barrier is a watertight material that blocks moisture passage, and whether you need one depends on where you live and which wall you’re finishing.
Exterior walls in cold climates almost always get one, hung on the warm side of the insulation so moist indoor air can’t reach the cold framing and condense.
Interior walls rarely need it, and in hot, humid regions a barrier on the wrong side can trap moisture inside the cavity and rot the lumber.
I skipped the barrier on a basement partition once and was fine, but the exterior wall above it got polyethylene sheeting because January air here will find every gap.
Seal the seams with acoustic sealant or rated tape, not duct tape, which dries and curls in a few years.
After that, drywall covers it all and you stop thinking about it until you drill into the wall for a shelf.
let us know your "diploma size," choice of two "insignia logos" and "gold or silver engraving" with "Personalization info." Make sure you let us know the correct diploma size. Complimentary Motivational Quotes Gold Keychain Gift exclusively by AllGiftFrames Framing Achievement Inc.

For sill plate installation, fill all round holes

WALL COMPONENTS: Labels top plates, bottom plate and common studs.
Drywall and Interior Finish
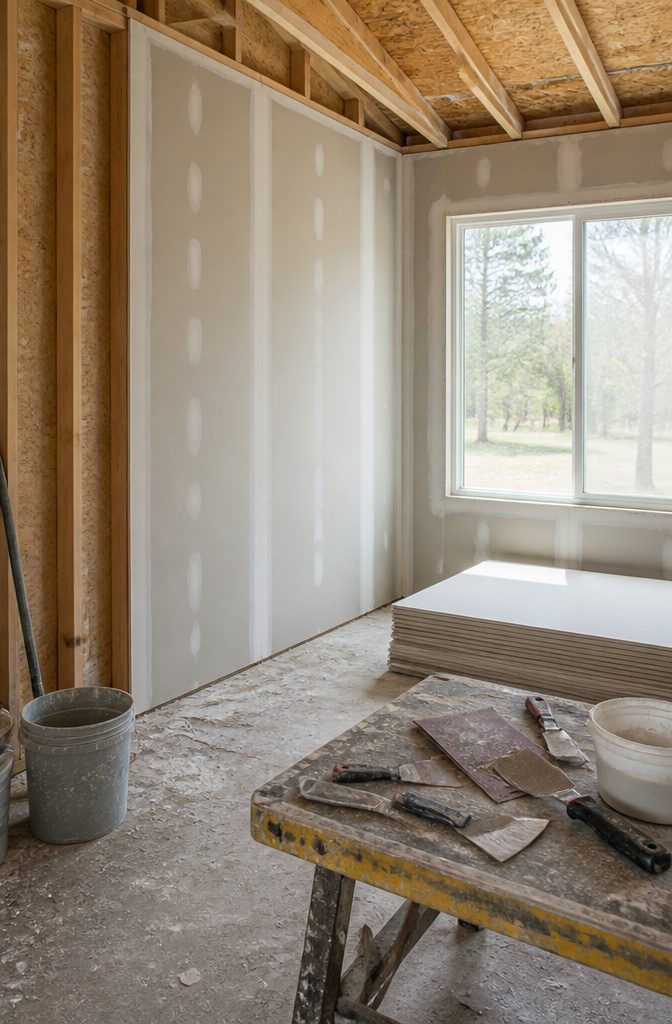
Drywall hangs perpendicular to the studs, not parallel, so each sheet spans across several framing members and gains strength from the spread.
Half-inch thickness is standard for walls, and that is what I would reach for in any ordinary residential room unless there is a specific reason to go thicker.
The 1/2-inch board is light enough to carry alone, bends slightly to forgive a stud that is not perfectly flush, and costs noticeably less than the 5/8-inch fire-rated panels you will see stacked nearby.
Taping and mudding the joints takes longer than hanging the sheets, and the patience is in letting each coat cure before sanding and adding the next.
I have rushed this and paid for it with ripple lines that telegraph through the paint months later. A wide blade and a steady hand matter more than expensive compound.
For a utility space or a first project, a level-three finish is plenty; save the skim-coated, level-five perfection for rooms where afternoon light hits the wall at a raking angle and every flaw announces itself.
Paint and primer seal the surface, but only after the dust from sanding is actually gone, not merely waved at with a broom.

The Builders Edge 33 5/8" X 6" Flat Panel Window Header Adds Decorative Architectural Detail To Your Windows

8" X 9" Flat Panel Window Header adds decorative architectural detail to your windows

8" X 9" Flat Panel Window Header adds decorative architectural detail to your windows
Tools for Framing
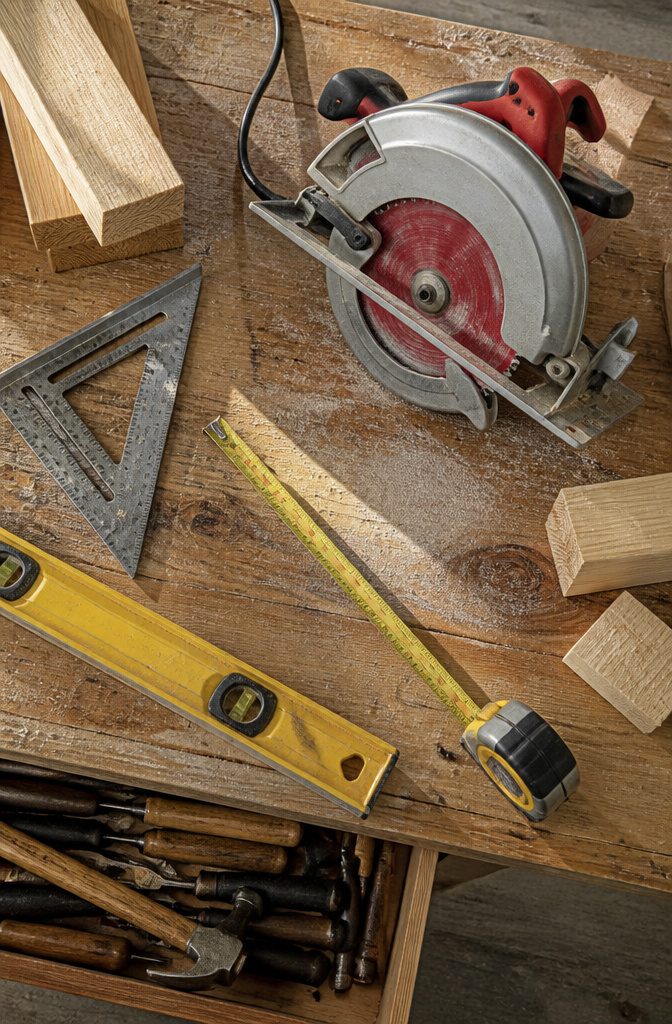
A circular saw handles most of the cuts for a wood framing wall, though a miter saw saves time when you are cutting dozens of studs to the same length.
The blade matters more than the motor size: a 24-tooth framing blade cuts faster and stays cooler through wet lumber than the fine-tooth blade that comes with most saws.
The tape measure and framing square live on the subfloor next to your cut pile, not back in the truck.
A 16-foot tape is long enough for almost every residential wall, and the square checks that your corners stay true when you assemble the frame flat.
The chalk line snaps plate layouts quickly; the 3-4-5 method on the square confirms them before you drive the first nail.
Levels and nail guns split the work between speed and patience.
A 28-inch level fits inside stud bays for plumb checks while you are raising, and a full-length level on the double top plate catches the long bows you will not see otherwise.
A pneumatic framing gun with 3-inch ring shank nails sets plates in minutes, but a 22-ounce hammer still wins for toenailing studs where the gun will not angle.
The hammer also drives the occasional stubborn nail that blows out the side of a green stud, which happens more often than the tool reviews suggest.

2-Pack 16-Inch Stud Layout Accuracy: Includes two heavy-duty steel stud spacer tools designed for standard 16-inch on-center spacing. Helps create precise wall stud layouts with consistent measurements and reduced errors.
Many Uses - This product is suitable for new home construction, renovation projects, and more and has been tested for many different jobs.
Balloon and Platform Framing
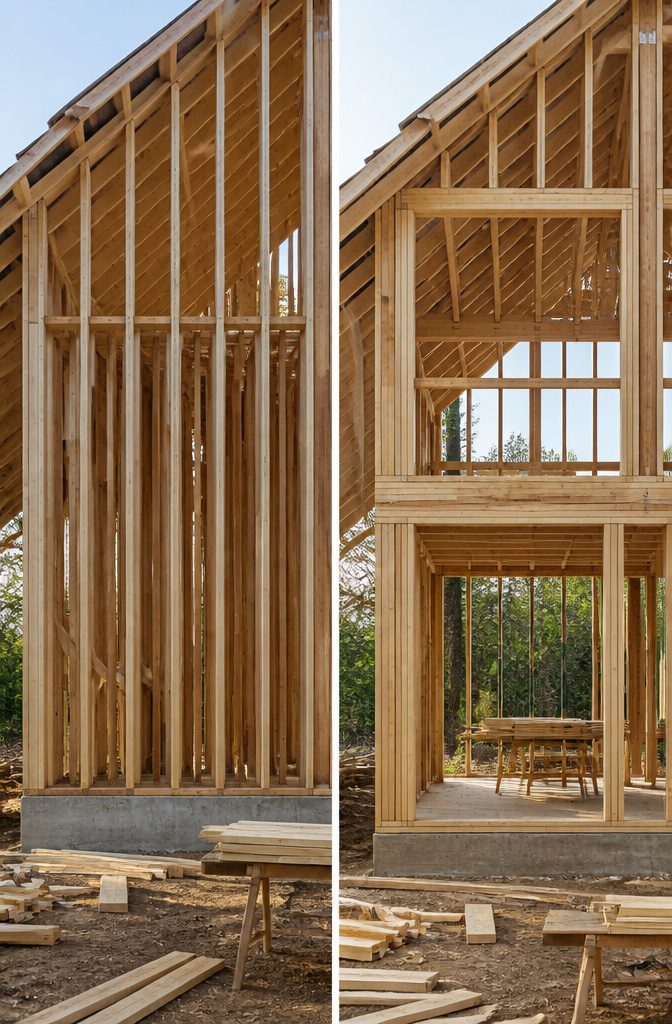
Two methods have shaped how American houses get their skeleton, and the one you are almost certainly standing inside right now is platform framing.
Balloon framing sends the studs in one continuous run from the sill plate at the foundation all the way to the eaves.
No breaks, no intermediate floors hung off the wall; the same two-by-four might start in the basement and end under the roof rafters.
It dominated construction from the late 1800s into the early twentieth century, partly because it went up fast with the long, clear lumber then readily available.
Those uninterrupted stud bays run like chimneys from floor to floor, which is why balloon frames depend on tight fire-stopping at each concealed space to slow a fire’s spread.
Platform framing builds each floor as its own box. Studs rise from the subfloor platform below and stop at the next subfloor above, which then becomes the platform for the studs above that.
Each level is a separate assembly stacked on the last. Fire-stopping happens naturally at every floor line because the platform itself breaks the stud bay.
It also lets carpenters work on the ground for each floor instead of reaching up from ladders below, and it handles the shorter lumber that became standard as old-growth supplies tightened.
Platform framing is now the standard in residential construction. Walk through any subdivision framed in the last seventy years and you are looking at platforms stacked on platforms, not balloons.
Framing Components
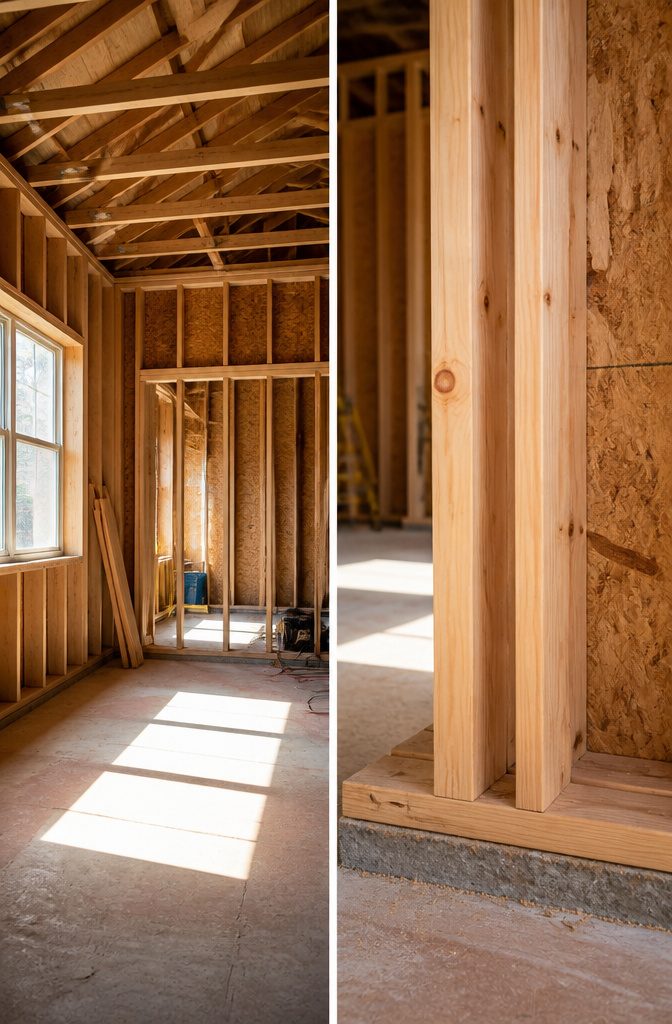
A wood framing wall is basically a skeleton, and every bone has a job. Studs are the vertical members, spaced on center from one another, carrying the wall’s weight straight down to the floor.
The plates run horizontal across the top and bottom; the top plate in particular runs end to end and gives the rafters something to sit on, while the sole plate rests on the subfloor and anchors the studs below.
Where a window or door interrupts that vertical line, the header steps in as a horizontal beam, joined to trimmers so the load can route around the opening instead of collapsing it.
Finally, sheathing goes over the whole frame as rough boarding, tying the studs together and giving the wall its lateral stiffness before any interior finish ever goes up.
Balloon framing runs studs sill to eaves without a break; platform framing breaks them at each floor.
For a weekend build, platform is usually the call, because shorter studs are easier to true up on the ground before you raise them.
Frequently Asked Questions
What are the basic components of a wood framing wall?
A wood framing wall is made of studs, plates, headers, and sheathing.
Studs carry weight straight down to the floor; plates run horizontal across the top and bottom to anchor and tie the wall together; headers bridge openings like doors and windows; and sheathing boards over the frame to give the wall its lateral stiffness.
What is wood framing on walls called?
Wood framing on walls is called a wood framing wall, or simply framing or stick framing in common jobsite language.
The two main methods are platform framing, which builds each floor as a separate box stacked on the last, and the older balloon framing, which runs studs in one continuous line from sill to eaves.
How do you frame a wall for beginners?
Build the frame flat on the deck or floor, not upright: bottom plate first, studs on layout at 16 inches on center, then the top plate.
Use 16d nails or 3-inch screws, two at each end of every stud, and check the diagonals with a tape to keep the frame square before you stand it.
A wall even an inch out of square will fight you through every later step.
What type of wood is used for framing walls?
Standard dimensional lumber is what you will see on most residential sites. 2x4s are the common choice for interior partition walls, and 2x6s are typical for exterior walls where the deeper cavity holds more insulation.
For taller walls or longer spans, builders step up to 2×6 or 2×8 joist material, or move to engineered lumber like LSL to avoid warped boards and splice points.